How to Make Paper at Home the Easy Way
How to Make Paper at Home
There is something quietly magic about turning a pile of scrap paper into a fresh, beautiful sheet you made with your own hands. Learning how to make paper at home is part science experiment, part meditation and part rebellion against waste.
In this guide we will walk through how to make paper at home using simple tools, recycled scraps and a bit of patience. You will learn how to turn waste paper into strong, smooth, writing friendly sheets. We will keep things practical and beginner friendly so this becomes the only tutorial you need when you search for how to make paper at home or easy DIY paper making projects that actually work.
By the end you will feel confident making homemade recycled paper for cards, art, gift tags and school projects. You can use the same method to experiment with colour, texture and inclusions later.
Quick Navigation
Use these links to jump straight to the part you need.
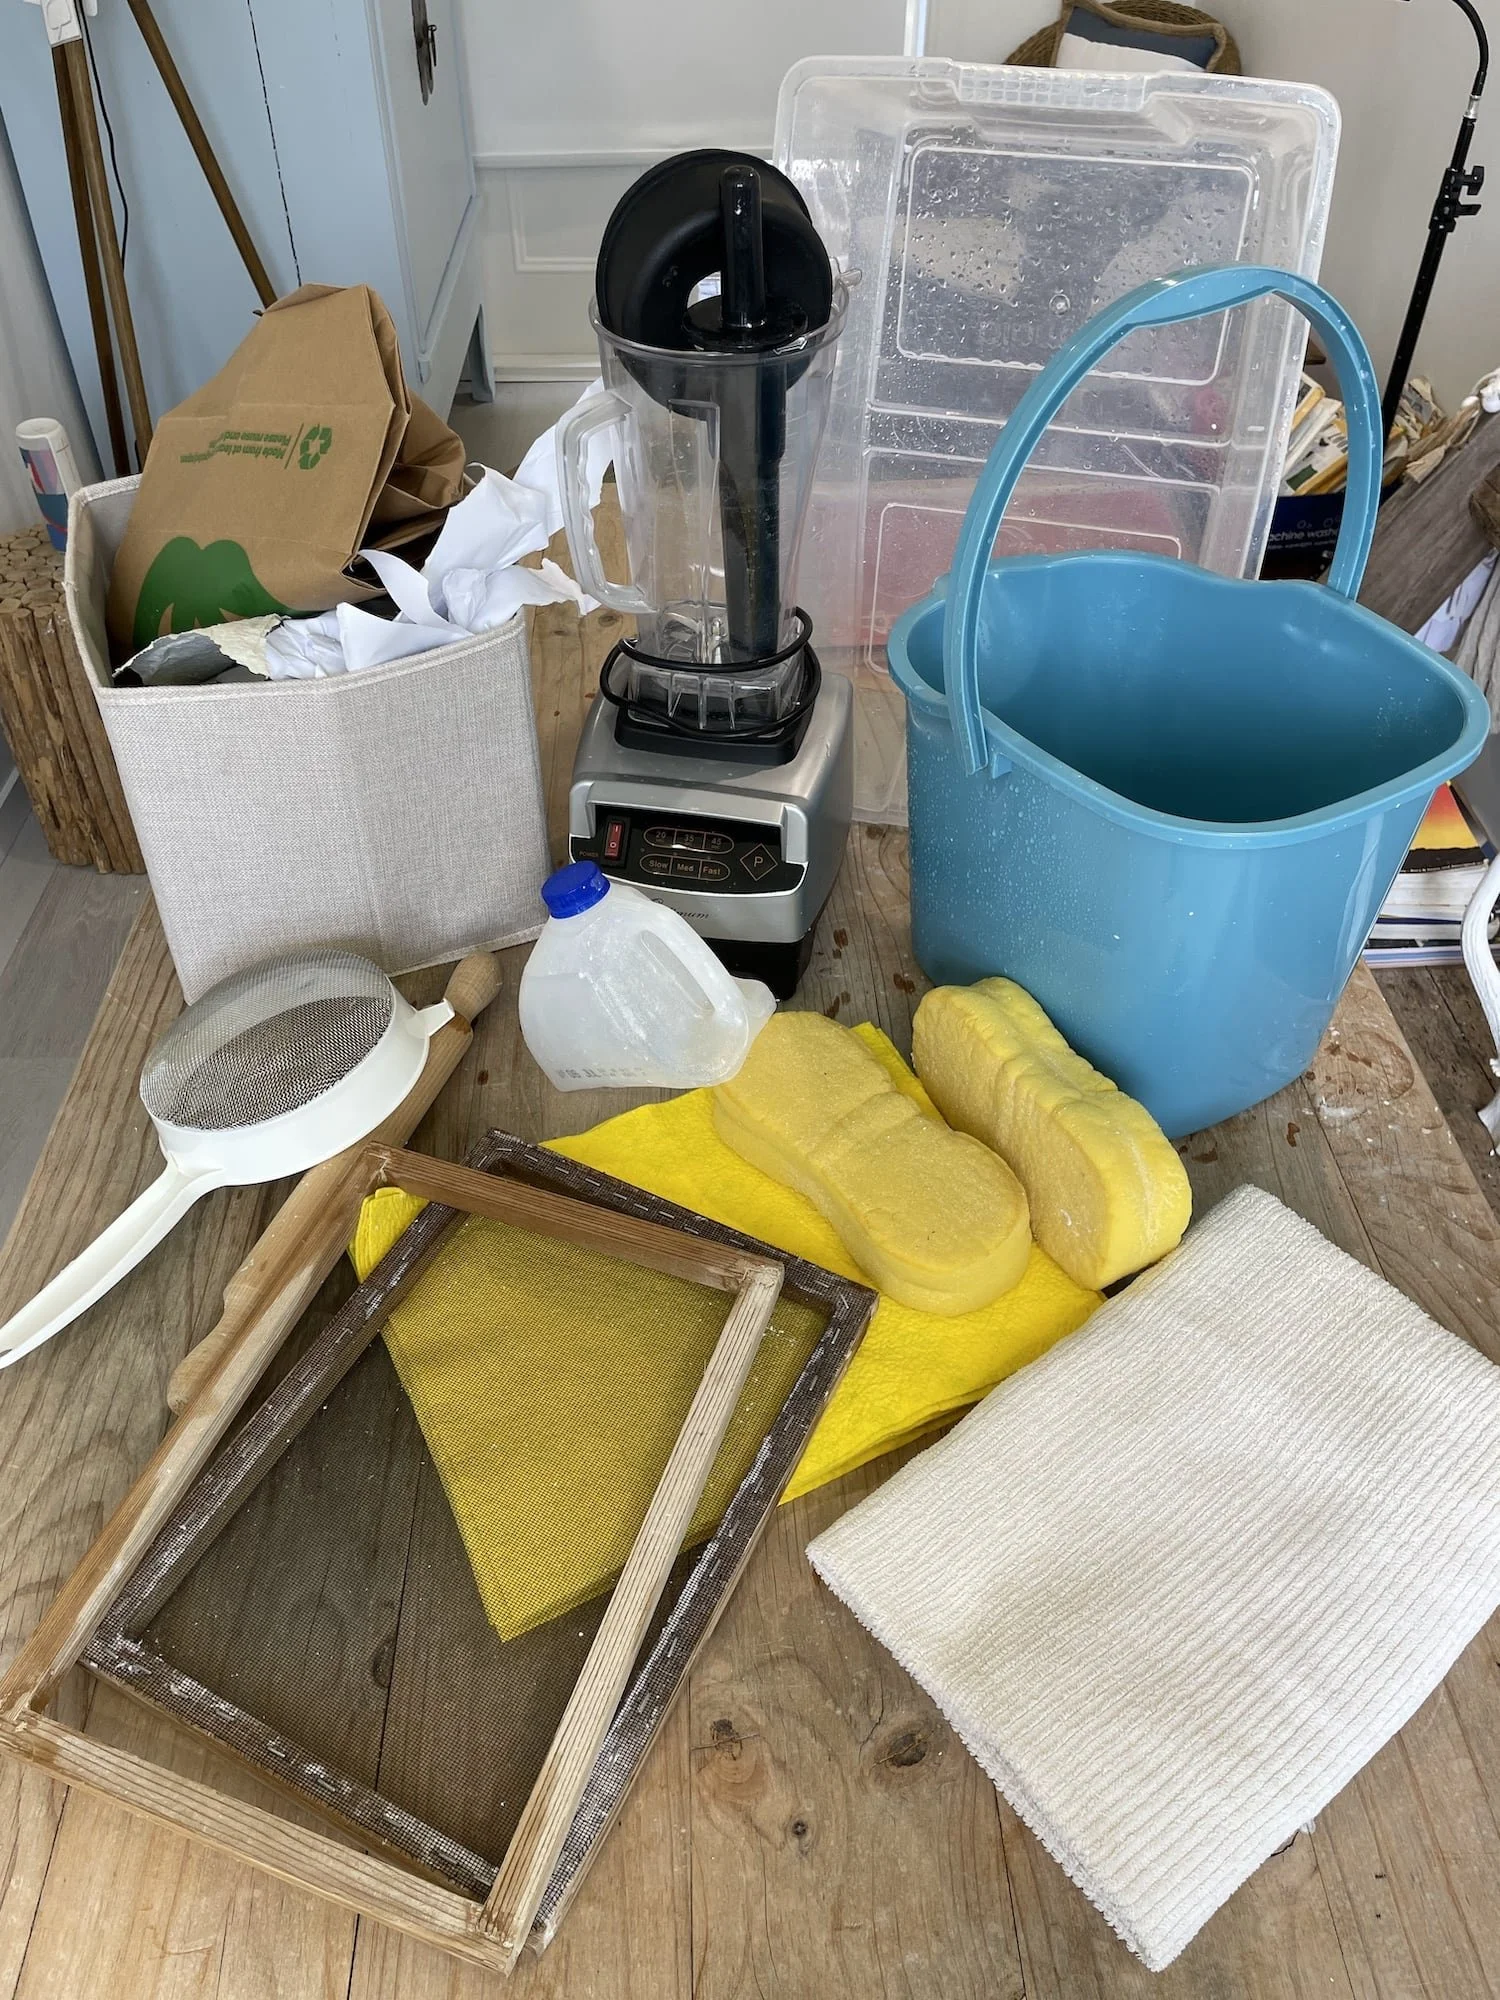
What You Need for DIY Paper Making at Home
Before you begin, gather your tools and materials. This simple kit works well for most homemade recycled paper projects.
1 Recycled paper for pulp
Use uncoated waste paper such as old office print outs, envelopes without plastic windows and paper bags. Avoid glossy magazines and heavily coated flyers as they do not break down cleanly and can create weak homemade recycled paper.
2 Water
You will use water for soaking, blending and forming each sheet. Room temperature tap water is fine for small home batches.
3 Dedicated blender
A blender breaks the paper fibres down into pulp. Do not use your everyday kitchen blender. Inks and paper additives do not belong near food. Find a cheap second hand blender and keep it only for DIY paper making.
4 Mould and deckle or simple frame
A mould and deckle is the frame set that shapes each sheet. You can buy one from a papermaking supplier or make your own from an old picture frame and fine mesh. This frame controls the size and lovely deckle edge on your handmade paper.
5 Vat or tub
The vat is the container where pulp and water are mixed. Choose a plastic tub wide enough to dip your mould and deckle in fully. A shallow under bed storage tub works very well for home paper making.
6 Couching cloths and boards
Couching cloths are absorbent sheets that receive the wet paper. Use felt, old flannel sheets or smooth cotton towels. Two flat boards or trays help you stack and press your sheets evenly.
7 Sponges and a pressing weight
Soft sponges help remove surface water before pressing. A pile of heavy books, bricks wrapped in cloth or a simple press provides the weight that makes your homemade paper strong and smooth.
8 Drying surface
Use a clothes airer, clean mesh racks or dry cloths laid on a table. The key is good airflow so your recycled paper can dry slowly and evenly.
How to Make Paper at Home Step by Step
This is the core method for how to make paper at home using recycled scraps. Work through each step slowly the first time. Once it feels familiar you can move more quickly and start to experiment.
Step 1: Prepare and soak the paper
- Tear your recycled paper into small pieces about the size of a postage stamp.
- Place the pieces in a bucket or large bowl and cover with warm water.
- Leave to soak for at least thirty minutes. A few hours is even better for thick card or envelopes.
Soaking softens the fibres and makes the blending stage easier. It is the quiet part of DIY paper making where you can have a cup of tea and feel smug that you are keeping paper out of landfill.
Step 2: Blend the pulp
- Place a handful of soaked paper into your dedicated blender.
- Add enough clean water to cover the paper well.
- Blend for thirty to sixty seconds until the mixture looks like a smooth, cloudy slurry with no large flakes.
This pulp is the base of your homemade recycled paper. If it looks chunky, blend a little more. If it looks like thick porridge, add more water and pulse again. For most home paper making projects you are aiming for a consistency similar to thin milk.
Step 3: Charge the vat
- Pour the blended pulp into your vat or tub.
- Add more water and stir with your hand until the pulp is evenly suspended.
- If the pulp sinks in clumps, add a little more water and stir again.
This step is called charging the vat. When the pulp is well mixed, every dip of the mould and deckle will give you a similar sheet. This is one of the secrets behind consistent DIY paper making at home.
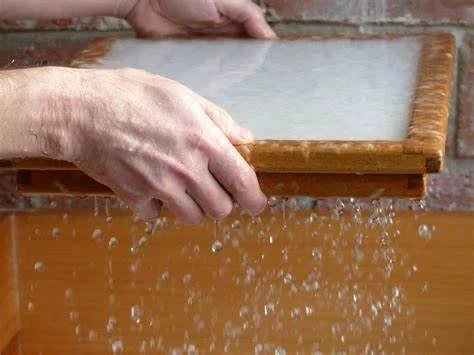
Step 4: Pull the sheet
- Hold the mould and deckle together with the mesh facing up.
- Dip the frame into the vat at a slight angle and then level it under the surface.
- Lift the frame up through the water in one smooth movement.
- Give a gentle front to back and side to side shake to settle the fibres evenly.
You will see a thin layer of pulp resting on the mesh. This is your new sheet of paper. Let the water drain off for a short time before you move on.
Step 5: Couch the sheet
- Lay a couching cloth on a flat board.
- Remove the deckle so only the mould with wet pulp remains.
- In one confident motion, flip the mould face down onto the cloth.
- Press the back of the mould gently with a sponge to help the sheet release.
When you lift the mould away, the fresh sheet of paper should stay on the cloth. If it sticks in places, do not panic. This is a normal learning moment when you first try DIY paper making at home.

Step 6: Build your stack
- Place another couching cloth on top of the first sheet.
- Repeat the pull and couch steps until you have several sheets layered with cloth between them.
- Finish with a cloth on top, then place your second board over the stack.
This layered stack is often called a post. Building a post lets you press many sheets at once which saves time and gives you more even results.
Step 7: Press the paper
Pressing is the most important stage for strong, flat handmade paper.
- Place the post and boards on the floor or a sturdy table.
- Add your weight on top. This might be a stack of heavy books or a simple press.
- Leave the stack under pressure for at least ten to fifteen minutes. Longer is even better.
Pressing removes excess water, pulls fibres together and smooths the surface. It is the key difference between lumpy craft paper and beautiful homemade paper that you can proudly write or print on.

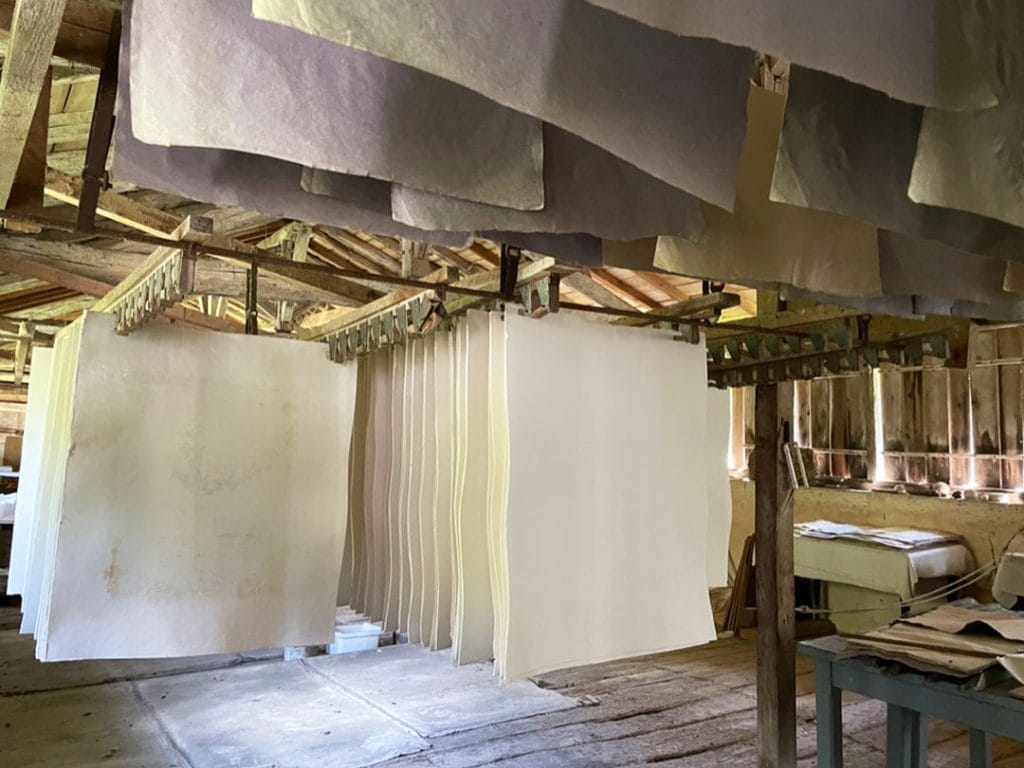
Step 8: Dry the sheets
- Carefully peel each damp sheet away from its cloth.
- Lay the sheets flat on a drying rack or clean dry cloths.
- Leave them to dry in a well ventilated room out of direct sun.
Drying can take one to two days depending on your climate. When fully dry, the sheets should feel crisp but not brittle. At this point you have your first batch of homemade recycled paper made from scraps that would otherwise go to waste.
Troubleshooting Common Paper Making Problems
Even experienced papermakers meet the occasional wonky sheet. Here is how to fix the most common issues when you are learning how to make paper at home.
-
Problem: Sheets are thick in some areas and thin in others
Fix: Your mould was not level or the pulp was not mixed well. Stir the vat again and focus on lifting the frame straight up with a gentle shake to even out the fibres.
-
Problem: Paper falls apart when you lift it
Fix: The pulp may be too watery or you may be skipping the pressing time. Add a little more pulp to the vat and make sure you press the stack firmly before drying.
-
Problem: Sheets dry with strong waves or curls
Fix: This usually means uneven drying or not enough pressing. Try pressing for longer and dry the sheets under a light weight for part of the drying time to keep them flat.
-
Problem: Visible coloured specks or unwanted bits
Fix: This comes from printed inks, staples or glossy coatings in the original paper. For smoother results in future batches, choose plain unprinted paper or remove heavy printed sections before soaking.
-
Problem: Musty smell or spots on the paper
Fix: The paper has stayed damp for too long. Allow good airflow while drying and clean all equipment between sessions so your next batch of homemade paper stays fresh.
Creative Project Ideas for Your Handmade Paper
Once you know how to make paper at home the real fun begins. Here are a few ideas for using your new sheets.
- Greeting cards and gift tags: Cut your homemade paper into card blanks or tags. The texture adds instant character.
- Art prints and collage: Use your paper as a base for drawing, printmaking or mixed media collage.
- Journals and sketchbooks: Bind several sheets together with a simple stitch to create handmade notebooks.
- Certificates or menus: For small events, homemade recycled paper makes simple documents feel thoughtful and considered.
If you ever decide you would rather skip the mess in the laundry and work with professionally made recycled or seed paper, you can always explore the options in our product range. There is no rule that says you cannot love both DIY paper making and ready to use sheets that arrive cut to size.
FAQ About How to Make Paper at Home
Do I have to use a special mould and deckle to make paper at home
No. A simple frame made from timber strips and fine mesh will work. A proper mould and deckle will give you more consistent edges and is worth the investment if you plan to make homemade paper often.
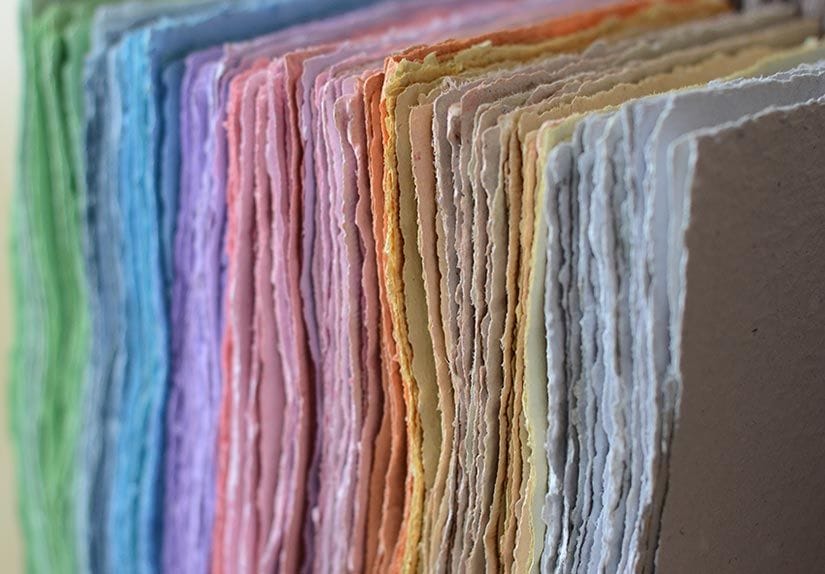
Can I add colour to my homemade recycled paper
Yes. You can add coloured scraps of paper to the pulp or stir in small amounts of liquid or powdered pigment after blending. Always test small batches first until you understand how strong the colour appears once the paper dries.
Is homemade paper strong enough for printing
If you press the sheets well and keep them reasonably thin, many home printers will handle them without trouble. Always test one sheet first and feed it manually. Laser printers can run hotter than inkjet printers so start with inkjet if you are unsure.
How long does it take to make paper at home
The active time for one batch is usually one to two hours once you know the process. Drying takes much longer. Expect one to two days before the sheets are ready to use. You can shorten this slightly in a dry climate with good airflow.
What is the difference between this and plantable seed paper
The core method is the same. Plantable paper has seeds added to the pulp at the vat stage which means the sheet can be planted later. For this tutorial we focus on how to make paper at home for general use without seeds. If you are curious about seed paper, we have a dedicated guide for that as well.
Explore More Handmade Paper Projects
Once you have mastered making paper at home, you might enjoy exploring two of our most popular seed paper guides. They follow the same simple process but introduce Australian native seeds for an extra eco-friendly twist.
Learn More About Reducing Waste in Australia
If you are curious about the bigger picture of recycling and waste reduction, you can explore Australian environmental waste reduction guidance from the Department of Climate Change, Energy, the Environment and Water.