How to Create Conference Name Badges in Canva That Don’t Suck
We’ve all been there: standing at a networking event, squinting at someone’s chest, trying to decode a badge that looks like the dogs breakfast.
Awkward 😬.
Badges should do the opposite. They should break the ice, not freeze it. A good badge shouts your name from across the room, balances branding with readability, and (in Terra Tag’s case) doesn’t end up in landfill for the next 500 years.
And the best part? You don’t need to be a designer to get it right. Learn how to create name badges in Canva with this step-by-step guide. You’ll can create conference-ready artwork that looks sharp and prints perfectly on our seed or recycled paper.
Ready to stop nudging boxes around and hoping for the best?
Use our Canva templates built around readable badge hierarchy. Each layout starts with the thing that matters most, the attendee’s name, then gives branding, role and company details a proper place to sit. Less guesswork. Fewer badge crimes. Much calmer printing.
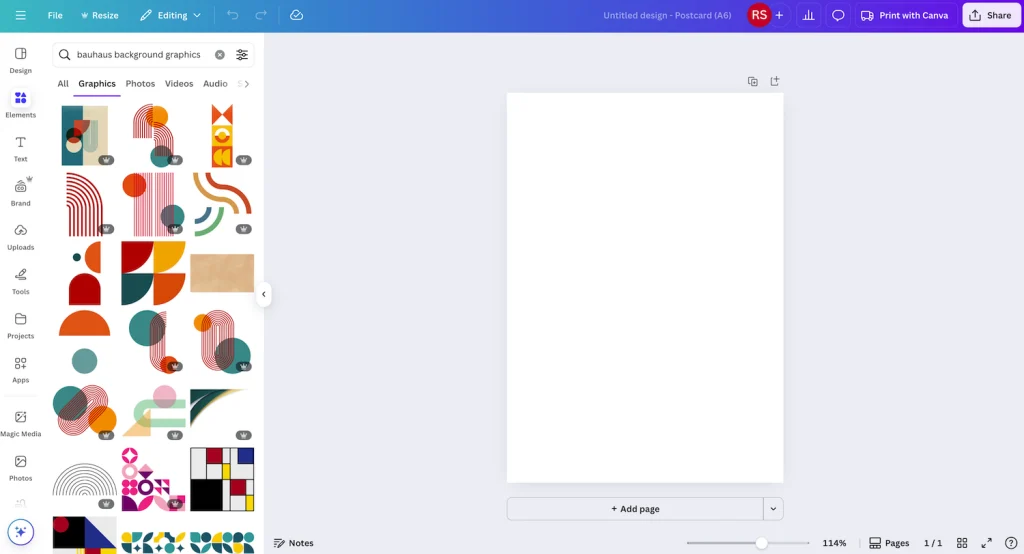
1. Set Up Your Name Badges in Canva
- Open Canva and click Create a design → Custom size.
- Switch the size units to millimetres (mm).
- Enter:
- 74 × 105 mm (A7) OR
- 105 × 148 mm (A6).
- Choose Portrait or Landscape depending on your layout.
- Portrait works best if you’re stacking info (name → title → org).
- Landscape works if you have a wide logo or lots of sponsor content.
- Hit Create new design.
👉 Pro tip
Save this file as “Conference Badge Master” so you can duplicate it for future events – it’ll save you from having to recreate another name badges in Canva file.
Sidebar: Other Common Badge Sizes Explained
Not every badge is created equal. When considering sizing your name badges in Canva file, here’s what you’ll find out in the wild — and why we stick to A6 and A7 for Terra Tag.
A7 (74 × 105 mm)
- Small and tidy.
- Perfect for minimalist events.
- Ours are handmade, plantable, and biodegradable 🌱 — not landfill.
A6 (105 × 148 mm)
- The most popular conference badge size worldwide.
- Room for name, job title, org, logos and QR code.
- Terra Tag’s sweet spot: eco-friendly, durable, and designed for multi-day wear.
Credit Card Size (85 × 54 mm)
- Industry default for PVC holders.
- Downside? Plastic on plastic. Tiny names = squint city.
- Bad for networking. Worse for the planet.
4 × 6 inch (102 × 152 mm)
- A U.S. favourite, often in plastic sleeves.
- Bigger = space for sponsors, but also bulkier to wear.
- Terra Tag alternative: A6 — just as readable, zero landfill guilt.
Custom Oversized (120 × 90 mm and up)
- Used for VIPs or exhibitor passes.
- Doubles as a mini billboard.
- Still mostly plastic-based. Terra Tag can scale sustainably without the waste.
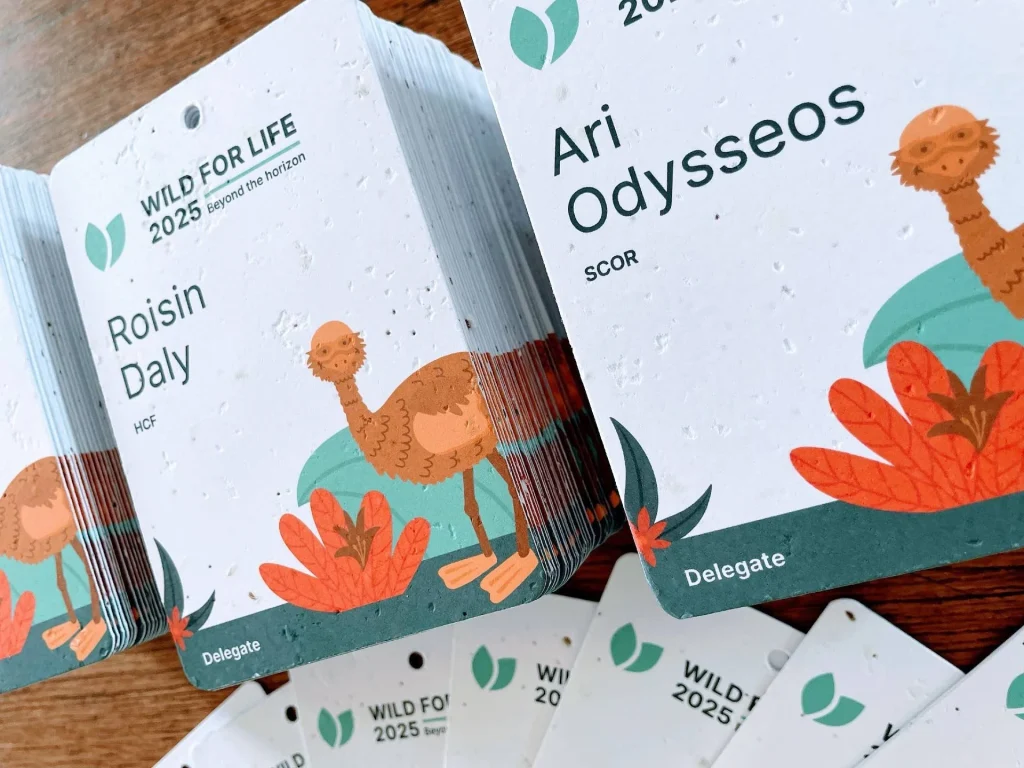
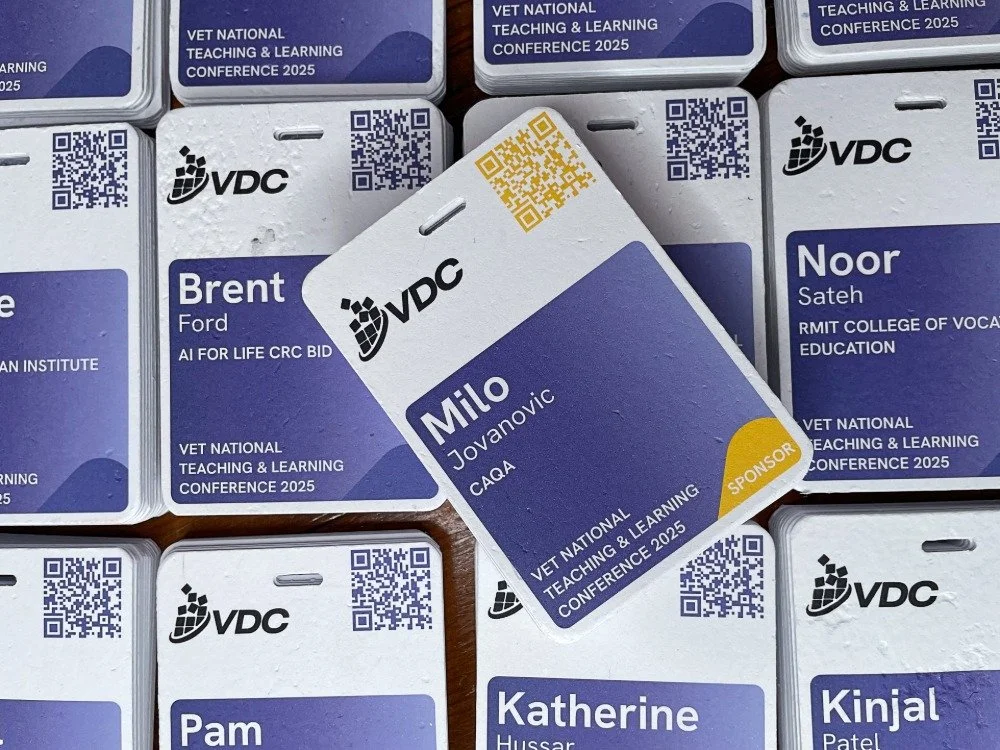
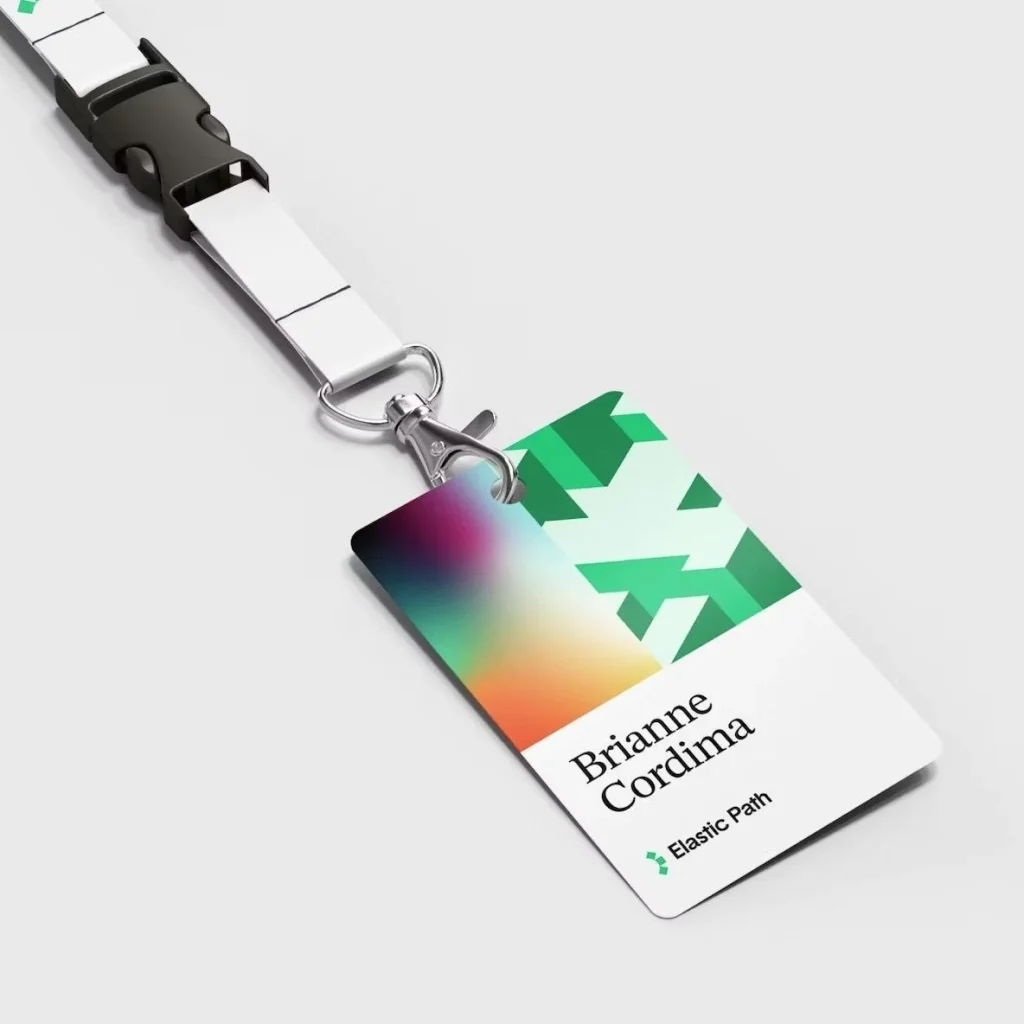
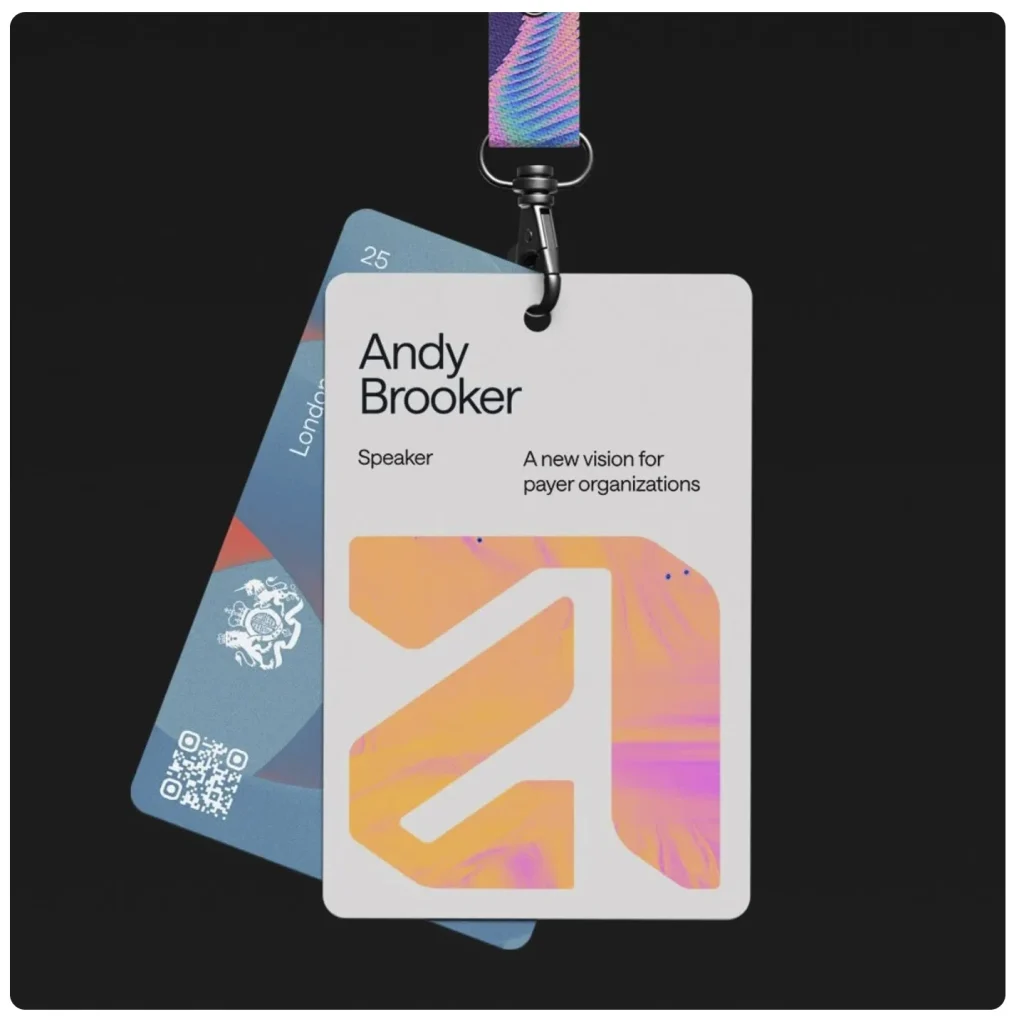
2. Design the Front of Your Badge
→ First Name Must SHOUT
Your guest’s first name is the star. Everything else? Supporting cast.
In Canva:
- Click Text → Add a heading.
- Type a sample first name (e.g., Sarah).
- In the top menu set:
- Font = Montserrat Bold (or Arial, Helvetica, Open Sans).
- Size = 36–48 pt (must be readable from 2–3 metres).
- Alignment = centre or left.
Test it:
- Zoom your name badges in Canva file to 100%.
- Step back from your screen ~2–3 metres.
- If you can’t read it instantly, make it bigger.
→ Add the Supporting Cast
Last Name, Job Title, Organisation
- Add separate text boxes for each.
- Font size: 14–24 pt, lighter weight.
- Align beneath the first name with clear spacing.
Optional: Event Branding
- Upload event logo (Uploads → Upload files).
- Place at the top of the badge.
- Keep size small — the logo should support, not dominate.
- You can also type the event title + year in a clean subheading font.
Optional: Event Message or Mission Statement
- Add a subheading at the top.
- Keep to one concise line (e.g., “Together for a sustainable future”).
Optional: Main Sponsor Logo
- Place at the bottom, centred.
- Use Effects → Background Remover (Pro feature) if needed.
- Keep width <25% so it doesn’t overpower the name.
→ Backgrounds & Colours
- In Canva, select Background (left panel) or upload your own image.
- Ensure high levels of contrast between background and foreground text
- Rule of thumb: background supports, never competes.
→ Quick Rules for the Front
- First name = hero, readable at 2–3 metres.
- Last name, title, organisation = smaller, supporting cast.
- Event logo at top, sponsor at bottom.
- Leave 1.5 cm at top for lanyard hole.
- Keep balance, don’t cram.
Skip the Stress. Let Terra Tag Do It All
Sure, you can design badges yourself in Canva. But if you’d rather not spend hours tinkering with fonts, resizing QR codes, and merging guest lists at midnight, we’ve got you.
At Terra Tag, we handle everything:
- Design help — we’ll polish your artwork so it looks sharp and prints perfectly on our handmade paper.
- Data merge — we merge every guest name into the design so you don’t have to.
- Print & pack — badges are printed, cut, and sorted in guest-list order for stress-free registration.
- Lanyards included — eco-friendly, pre-assembled, ready to wear.
All in one solution. No multiple vendors, no frantic last-minute fixes, no plastic landfill guilt. Avoid the effort of designing name badges in Canva altogether!
👉 The result: badges that look incredible, work flawlessly, and leave a positive impact long after the event.
3. Design the Back of Your Badge
The back is bonus real estate, but keep it clean and functional.
→ QR Code for Agenda (highly recommended)
- Upload QR code → resize to 2.5 cm square.
- Place bottom-centre or bottom-right, within safe margins.
- Test scan by printing a draft.
→ Disposal or Planting Instructions
- Add short text directly under the QR code:
- Seed paper: “Plant me to grow wildflowers 🌱”
- Recycled: “Recycle me — scan for instructions ♻️”
- Font size: 12–14 pt (legible but discreet).
→ Optional: Event Message
- One simple line at the top.
→ Optional: Supporting Sponsor Logos
- Place in bottom corners.
- Keep them small, single colour if possible.
- Don’t crowd the QR code.
→ Optional: Supporting Sponsor Logos
- White background.
- Margins: 2 cm top, 0.5 cm sides/bottom.
- No detailed graphics or large colour blocks.
- Remember: handmade paper may shift slightly → don’t aim for perfect centring.
💣 The Biggest Badge Mistakes We See (and How to Avoid Them)
We’ve printed tens of thousands of badges, and trust us: the same mistakes pop up again and again. Here’s how to avoid them when creating name badges in Canva.
1. Tiny Guest Names
No matter how many times we say it, this is the #1 fail.
- If the first name isn’t readable, the badge is useless.
- Rule: Make it readable from 2–3 metres or it doesn’t count (min 36pt)
2. Over-designed Badges
Design flair should never outshine the readability of a person’s name – honestly, nobody wants a busy billboard on their chest. It’s a ‘NAME’ badge.
- Full-colour floods, jazzy graphics, busy backgrounds → name gets buried; networking is impossible.
- Rule: Use spot colour on white or graphic header/footer: Simple, intelligent design is always best (think Apple).
3. QR Codes Too Small
A QR that won’t scan might as well not exist (and how embarrassing)!
- Minimum 2 cm square (we recommend 2.3–2.5 cm).
- Rule: Always test scan before you go to print.
4. Back of Badge Overload
- Forget note-taking spaces or other ‘hey wouldn’t this be cool’ features. People don’t look at the back of the badge. Nobody will use them.
- Rule: Keep backs simple: QR, disposal message, and maybe a sponsor logo. That’s it.
👉 Our expert advice:
Keep it simple when creating name badges in Canva. White background, spot colour accents, bold readable name. That’s how a badge works best — for the guest, for networking, and for the planet.
4. Balance & Spacing
Crowded badges = unreadable badges. White space makes everything easier to scan.
In Canva:
- Go to File → View settings → Show rulers & guides.
- Drag guides: 1.5 cm top, 5 mm all sides.
- Select multiple text boxes → Position → Tidy up.
Think of it as stage lighting: the more clutter on stage, the less your star shines.
5. Export Your Name Badges in Canva File
- Go to your name badges in Canva file, click Share → Download.
- Choose PDF Print (300 dpi).
- Uncheck Crop marks & bleed.
- Download:
- Front with sample guest name (for proof).
- Blank front (for merge).
- Back design.
6. Run the Badge Test
Before you hit send to print on your name badges in Canva file:
- Print one on your office printer.
- Stand 2–3 metres away: can you read the first name instantly?
- Blink test: does the name pop first (not a logo)?
- Balance check: does it feel calm and uncluttered?
If yes → it’s Terra Tag-ready 🎉.
A Canva badge done right isn’t just artwork. It’s the difference between awkward squinting and effortless networking. It’s also the first step in a badge that doesn’t end up in landfill but might sprout wildflowers instead 🌱.
Next step:
Download our free Canva templates, apply these rules, and send us your file. We’ll handle the rest so you don’t have to create name badges in Canva.